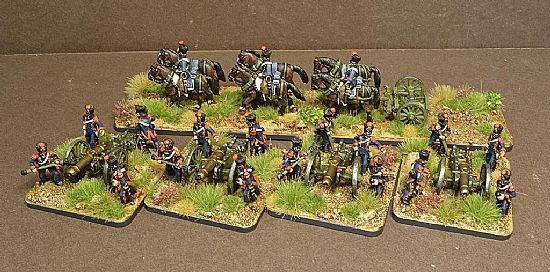
Basing tutorial
A lot of people find basing a problem. I guess its because they are into the hobby for the Miniatures and the Wargames and basing seems a bit of a chore. However, it is an essential step, that if not executed well, will ruin all your hard work on the figures themselves. The base should be viewed as a miniature diorama in its own right.
My approach to basing wargames figures is a little unorthodox. The tutorial will focus on a Flames of War infantry team but I use the same method for everything.
Most guides tell you to glue the figures to the base and then build up putty around them or add glue and sand. I don't like either of these methods for 2 reasons. Firstly, there is an increased danger of messing up the painted miniature. Secondly, it makes the mini very hard to remove if you ever want to re-base. My method, although still fast and effective is quite different, as I add the putty and primary base colour first.
The Tajima1 method:

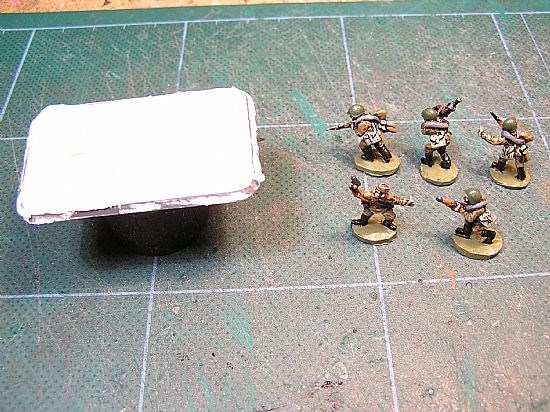
STEP 1: Ensure your painted minis have had their protective coats of GLOSS varnish before you start. This makes them easier to clean if you get any putty or paint on them. If they are already MATT coated or completely unvarnished, they are harder to clean if there is a mishap and less resilient to stains/scratching etc. With the gloss finish mistakes can be quickly washed off with a wet paintbrush. Get a piece of dowel or old paintpot etc with some Blu-Tak on it and attach the plain base to this. This way you have a handle while you work.
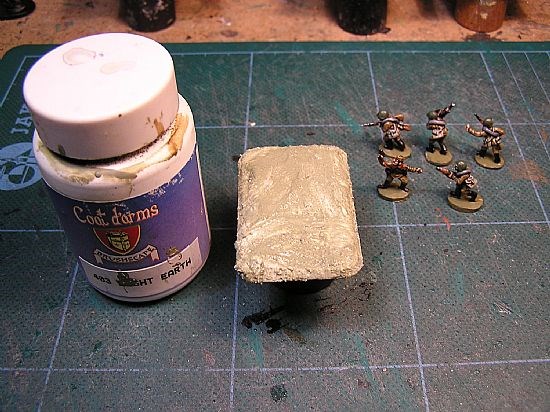
STEP 2: I use is DIY wall filler products. I always use the fine surface variety and mix in a good amount of PVA glu which makes it creamier and will dry stronger. I use an old clay tool to apply it, any spatula would do.
STEP 3: This is where things deviate from the norm. I put the putty on the base first. I quickly cover the entire base with few deft strokes to a depth of 2-3mm or thereabouts.
STEP 4: Still defying convention, I paint my primary base colour directly onto the still wet putty. I use cheap acrylic crsft paints mixed to give neutral green or tan base colours. (For desert minis I would use a very pale buff or sand colour at this stage.
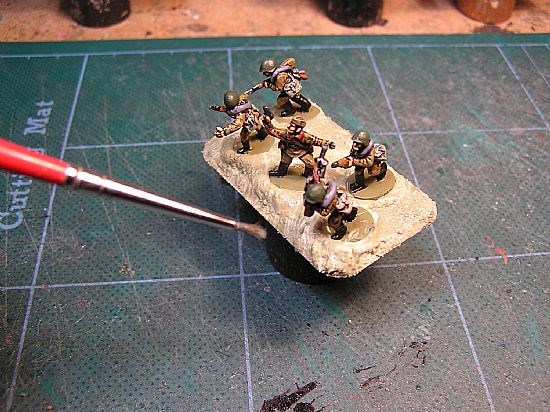
STEP 5: Still with me? Next I place my gloss coated minis directly into the painted wet putty in the composition I want. To break up the outline of their bases I use a really old and worn out brush and push the wet putty and paint around their individual base tops.
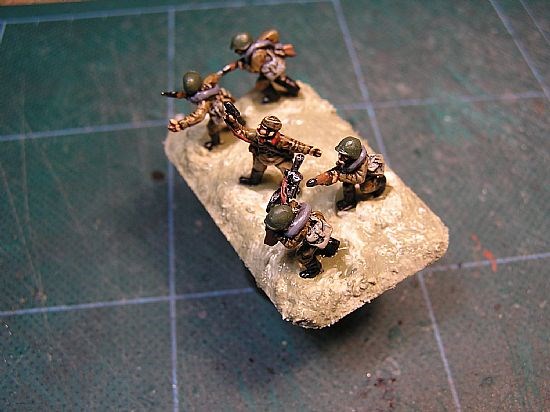
STEP 6: You can see this makes things much more organic and natural looking. The green base colour will lighten and become mixed with the putty in places but this is a good thing as you will see later!
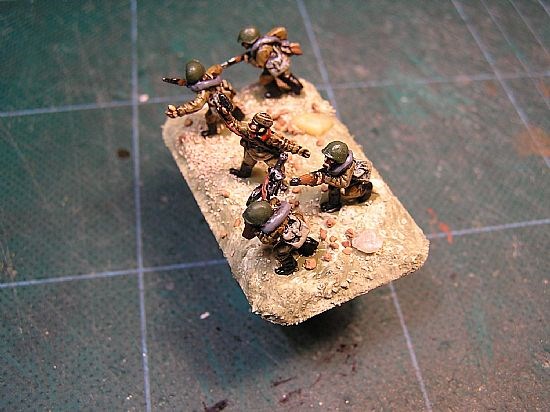
STEP 7: Place some small stones (only 1 or 2) into the putty and sprinkle on some gravel of various grades (Just a bit, sometimes Less is more!). Now let the whole thing dry overnight naturally. Don't try rushing things in a hot cupboard or under a lamp as the putty will shrink and crack if not dried naturally.

STEP 8: This is where things get interesting. Cover the entire base with a wash of a suitable colour to shade your base colour. I tend to use a generic wash of Vallejo Transparent smoke added to a mix of Johnsons Klear and water but any earthy colour mixed with water would do. The advantage of using the Klear base wash (some people call this magic wash) is it helps glue all the gravel down hard. Mixing PVA with the putty also helps with glueing down the gravel and sand.
Once the wash is dry the base will take on a much more realistic look and any inconsistecy of colour from STEP 6 will actually make things look even more realistic. When the wash is fully dry, drybrush with some very pale earthy colours to make the highlights pop!

STEP 9: This is my favourite step. I now dress the base using Tajima1's comprehensive range of Static Grass Tufts, model shrubs and other plants (Available in on this site in the Tajima1 shop or via ebay or Etsy shops). I use our self adhesive tufts starting with the small ones, which I place around the feet of the minis to hide any evidence of their bases and around the base generally as I see fit. I will usually place one Large or Medium tuft in there as more prominent scenery and perhaps a flower tuft or leafy shrub. Hell! lets use both, we make em after all.
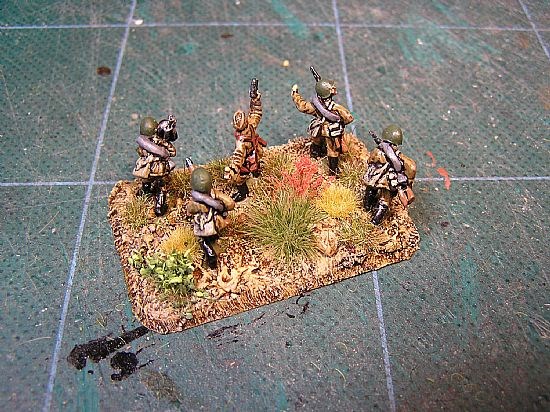
STEP 10: The beauty of Tajima1 tufts is they have very sticky bases and are really maleable. You remove them from the backing paper by grasping firmly with tweezers and then simply push them into position. You can be quite rough and push and pull them into the contours of the base.They go on easy with no glue and no dipping minis in boxes of messy scatter.
The ease of use in basing is precisely the reason we started making them in the first place, they make basing a pleasure and not a chore.

FINAL STEP:This is the point at which you apply the MATT varnish ( I used vallejo matt varnish from an airbrush). This ties everything together and has the added bonus for wargames pieces of really toughening up the static grass and other scenery elements. The base putty is very strong but if you ever need to re-base, use a flat head scewdriver pushed in under a figures metal base to pop them off. Try doing that if you glued them to the base first!
JOB DONE! happy basing.